Image Annotator: A Practical Guide to Arrows, Boxes and Mosaic on Screenshots
Annotate images in your browser: draw arrows, boxes, freehand pen, text, highlights and mosaic blur on screenshots or photos, then export as PNG. A practical guide to 100% client-side annotation with no upload.
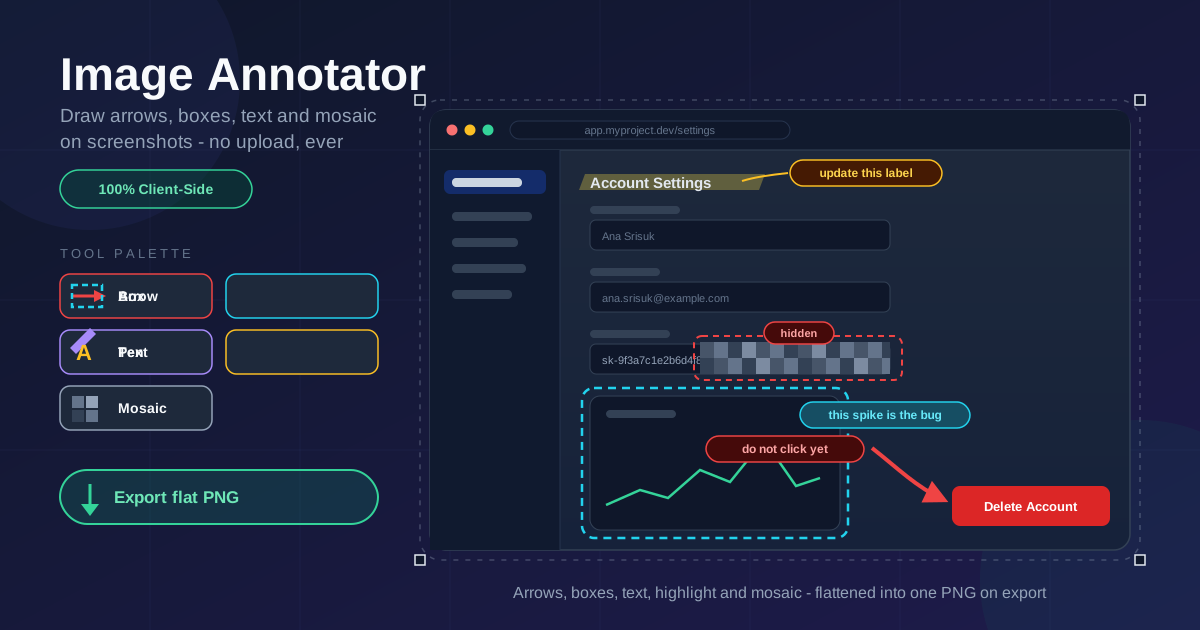
Table of Contents
Image Annotator: A Practical Guide to Arrows, Boxes and Mosaic on Screenshots
Most screenshot feedback fails before it is even read. "Look at the thing in the top right" is not feedback — an arrow on the screenshot is. Every extra sentence of description is another chance for the reader to reconstruct a different picture than the one you saw.
Image Annotator removes the guesswork. Load a screenshot or a photo into your browser, then draw directly on it: arrows, boxes, a freehand pen, text labels, a highlighter, and a mosaic blur for anything sensitive. One click exports a flat PNG that anyone can open — no special viewer, no layers.
Everything happens client-side, so unreleased designs and captures containing sensitive data never leave your machine. This guide covers what each annotation type is for and the conventions that make annotated screenshots communicate on the first read.
Why Use Image Annotator?
- No upload means safe for sensitive screenshots. Annotation is 100% client-side, so captures of admin panels, invoices, or logs containing tokens never leave your machine.
- Markup beats description. An arrow eliminates the ambiguity that three paragraphs of "the button below the header, not that header" can never fully remove.
- Each tool has one clear job. Arrows point, boxes frame, text explains, highlighters emphasize, mosaic hides — using the right one makes a screenshot explain itself.
- Zero setup. No installs, accounts, or plugins. Open the tool, drop in an image, annotate, export, in any modern browser.
- It flattens on export. The output is a single PNG with annotations burned into the pixels, rendering identically in every app.
- It works on photos too. The same tools mark up product defects, equipment labels, and faces that need protecting.
Key Features
| Feature | What it does |
|---|---|
| Arrows | Draw attention from empty space straight to the element that matters. |
| Boxes | Frame a region so the reader knows which boundary you mean. |
| Freehand pen | Circle, underline, or scribble when a straight line is too rigid. |
| Text labels | Add short explanations or step numbers right on the image. |
| Highlighter | Sweep a translucent stroke over the lines that deserve emphasis. |
| Mosaic blur | Pixelate faces, credentials, and personal data beyond recognition. |
| PNG export | Produce one flattened image ready for any channel. |
Worth knowing before you start:
- Annotations are burned in at export. The PNG has no separate layers, so plan the composition first.
- The palette is deliberately small. Six tools cover virtually every feedback situation, keeping the canvas clean and the message obvious.
How to Use
- Load your image. Drop a screenshot or photo into Image Annotator, or paste one from the clipboard.
- Pick the tool that matches your first idea. Start with the single most important point — usually an arrow or box.
- Draw the annotation. Drag to place an arrow or box, tap to add text, sweep to highlight, and brush over anything sensitive to apply the mosaic.
- Add labels for what shapes cannot say. Short text like "before" and "after" turns an image into a conversation.
- Review, then export the PNG. Confirm sensitive areas are fully covered and export the flattened image for your tracker, chat, or document.
Annotation Choices That Communicate
The difference between a helpful annotated screenshot and a chaotic one is almost always tool choice. Each type carries a different intent, and readers learn the signals quickly.
Arrows for Pointing
The arrow is the strongest "look here" signal. Use it for small or crowded targets: a checkbox in a settings form, one log line in a wall of text. Draw from empty space toward the target so the shaft never covers it, and keep to one arrow per idea.
Boxes for Regions
Boxes say "this area as a whole" rather than "this exact pixel". Frame a component, a panel, or the scope of a bug: the form whose submit button misbehaves, the region that should match the design mock. Thin or dashed strokes read as neutral boundaries.
Mosaic for Hiding Sensitive Data
Screenshots are full of things you did not mean to share: API keys in a terminal, addresses in a recipient list, balances in a dashboard. Brush the mosaic over every sensitive region before exporting, with a margin around the data so partial edges do not leak it. At export the pixels underneath are gone for good.
Text for Context
Shapes show where; text tells why. Keep labels short and near the annotation they explain: "crashes on click", "spike starts at 14:02". If a screenshot needs a paragraph of labels, write the paragraph in the ticket instead.
Highlighter for Emphasis
The highlighter marks the parts of existing content that matter: the sentence with the typo, the stack-trace line that reveals the cause. It adds no new shapes, so dense images stay readable. Use one color and one sweep per element.
Color Discipline
Color is your fastest channel, so spend it consistently: red marks errors and things to remove, green marks fixes and things to add, neutral colors carry commentary. If red means "wrong" in your first annotation, it should not mean "my favorite color" in the third.
Flattening on Export
When you export, annotations merge into a single flat PNG that opens anywhere and cannot be un-annotated to reveal what you blurred. The trade-off is finality — keep the tab open, adjust, and export again rather than editing the flattened file.
Practical Use Cases
Bug Reports with Context
A report saying "login is broken" costs a round trip; an arrow at the failing button, a box around the error message, and the label "HTTP 500 in console here" often closes the investigation before it starts. Add an extra arrow at anything unusual nearby.
Design Feedback That Designers Can Act On
Mark up the implemented page against the intent: a box around spacing that drifted, an arrow at the heading with the wrong weight. Pair it with a pixel-level comparison from Image Diff when you need to prove the drift objectively.
Documentation Illustrations
Tutorials improve when screenshots show exactly where to click. Number the steps with text labels, box the panel being described, and mosaic out any real user data. The flattened PNG drops cleanly into wikis and slide decks.
Privacy-Safe Sharing
Before posting a screenshot to a public tracker or forum, sweep the mosaic over email addresses, tokens, and internal URLs. Client-side annotation makes this a habit instead of a chore, because the image never touches a third-party server.
Best Practices
- Mosaic every credential and identifier before you export. API keys, tokens, and personal data should be blurred by default, even in screenshots you consider internal.
- One annotation type per idea. An arrow or a box for each point, not both aimed at the same pixel — redundant markup adds load without adding meaning.
- Use high-contrast colors. Check that every annotation stays visible against the underlying image, not just against your monitor.
- Point from empty space. Arrows drawn across content hide the content; approach the target from a margin instead.
- Keep labels under a dozen words. The image carries location, the label carries intent, and the ticket carries the full story.
- Leave the tab open until the image is delivered. The export is flat and final, so late fixes are cheap only while your annotations still exist.
Make Every Screenshot Speak for Itself
A screenshot with a well-placed arrow is the shortest document you will ever write. Open Image Annotator, drop in your next capture, and turn "look at the thing in the top right" into an arrow — entirely in your browser, with nothing uploaded.
Related Tools You Might Like:
- Image Diff — Compare two images pixel by pixel with threshold control and heat-map view.
- Screenshot Beautifier — Turn plain screenshots into polished, presentation-ready graphics.
- Dead Pixel Test — Check your display for dead or stuck pixels with full-screen color patterns.
Happy annotating — may your arrows always point at the truth.
Frequently Asked Questions
Q: Are my images uploaded to a server when I annotate them?
A: No. Image Annotator runs entirely client-side in your browser. The image is decoded, drawn on, and encoded back to PNG on your own machine, and no upload ever happens.
Q: Can I remove the mosaic from an exported PNG to see what was hidden?
A: No. The mosaic replaces the underlying pixels at export time, so the hidden content is permanently discarded in the flattened output. Always double-check sensitive regions before you export.
Q: What image formats can I annotate?
A: You can load the common browser formats, including PNG and JPEG screenshots and photos. Anything your browser can decode locally works, and the export is always a standard PNG.