Depth of Field Calculator: Master Focus and Sharpness in Every Shot
Use the free online Depth of Field Calculator to compute DOF, hyperfocal distance, and near/far focus limits from focal length, aperture, subject distance, and sensor format.
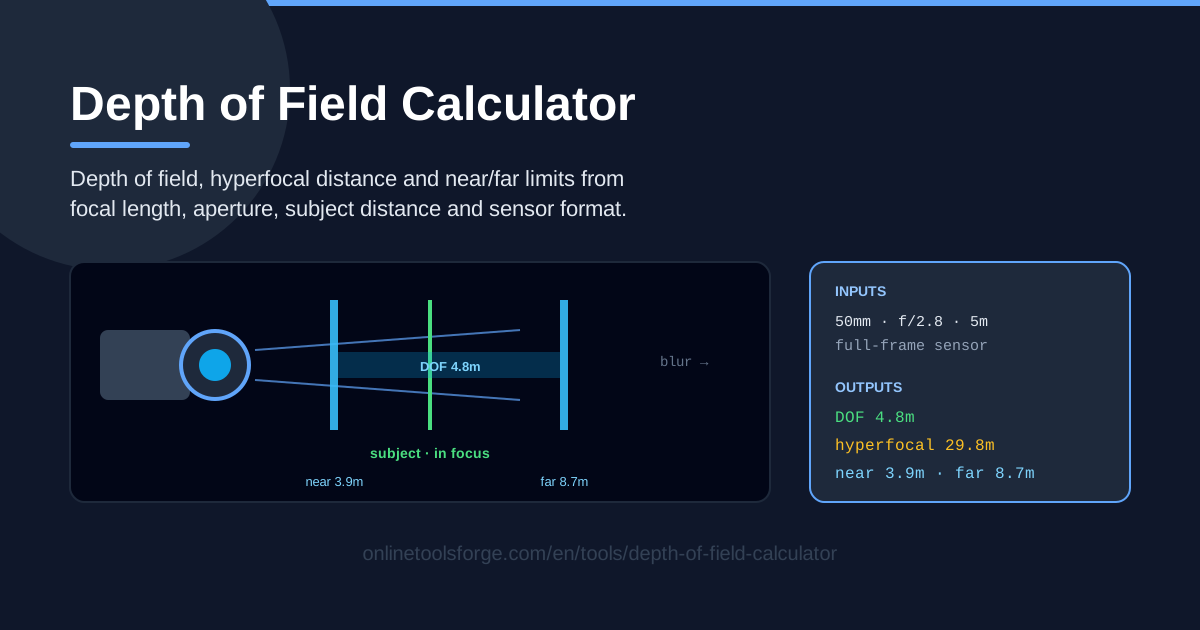
Table of Contents
Every photographer knows the frustration: you compose a portrait, nail the exposure, and later discover the subject's eyes are soft while the ears are razor sharp. Or you stop down to f/16 for a landscape, only to learn that f/8 would have delivered the same sharpness with none of the diffraction penalty. The culprit in both cases is depth of field (DOF) — the zone of acceptable sharpness in front of and behind your focus point. Unlike luck, it follows strict optics, which means it can be calculated before you ever leave the house.
That is exactly what the free Depth of Field Calculator on Online Tools Forge does. Enter your focal length, aperture, subject distance, and sensor format, and it instantly computes total depth of field, hyperfocal distance, and the near and far focus limits — entirely in your browser, with no sign-up and no data leaving your device.
This guide covers how to use the calculator, the optics behind the numbers, and how photographers apply those numbers in real shoots, from creamy portraits to tack-sharp landscapes.
Why Use Depth of Field Calculator?
- Eliminate guesswork before the shoot. Know exactly how much of the scene will be sharp before pressing the shutter, instead of chimping at the LCD and hoping for the best.
- Choose the right aperture with confidence. See how f/1.8, f/4, and f/8 change the sharp zone for your exact lens and distance, so you stop down only as much as you truly need.
- Get the hyperfocal distance instantly. Focus at the hyperfocal point and everything from half that distance to infinity is acceptably sharp — the single most valuable number in landscape work.
- Respect your sensor format. The same 50mm at f/2.8 behaves very differently on full-frame, APS-C, and Micro Four Thirds; the calculator applies the correct circle of confusion for each format automatically.
- Make smarter gear decisions. Before buying that f/1.4 lens, check how much extra shallow depth of field it actually delivers at your typical working distance.
- Fast and private. It is pure client-side photography math: no account, no uploads, and every result updates as you type.
Key Features
| Feature | What it does |
|---|---|
| Focal length input | Enter your lens's focal length (35mm, 85mm, 200mm) to see how magnification shapes the sharp zone. |
| Aperture (f-stop) | Compare any f-numbers and watch depth of field expand or contract in real time. |
| Subject distance | Set the camera-to-subject distance to model real framing, from close-ups to distant scenes. |
| Sensor format selector | Pick full-frame, APS-C, or Micro Four Thirds and the matching circle of confusion is applied automatically. |
| Near/far focus limits | See exactly where the sharp zone starts and ends, not just a single total figure. |
| Hyperfocal distance | Get the focus distance that keeps everything from half that distance to infinity acceptably sharp. |
Details worth highlighting:
- Sensor-format aware. The same inputs produce different results for each format, because smaller sensors magnify more at a given print size and tolerate less blur before it becomes visible.
- Actionable limits. Knowing your zone runs from 2.1 m to 3.4 m is far more useful on location than knowing it spans "about a meter."
- Instant recalculation. Change one value and every result updates immediately, so sweeping through apertures while planning takes seconds.
How to Use Depth of Field Calculator
- Pick your sensor format. Select full-frame, APS-C, or Micro Four Thirds first — this choice sets the circle of confusion behind every other calculation, so do it before anything else.
- Enter the focal length and aperture. Type in your lens, say 85mm for a portrait, and the f-stop you plan to shoot, such as f/1.8. Undecided? Re-enter different apertures to compare options side by side.
- Set the subject distance. Input how far your subject sits from the camera: measure to the eyes for portraits, or to your main foreground element for landscapes.
- Read the near/far limits and hyperfocal distance. The results card shows the near limit, far limit, total DOF, and hyperfocal distance. For landscapes, note the hyperfocal value — that is usually where you will focus instead of on the subject itself.
- Plan the shot. Choose the aperture that matches your creative intent, set focus at the hyperfocal distance or on your subject, and shoot knowing precisely what will be sharp.
The Optics Behind the Numbers
Circle of confusion: defining "sharp enough." No lens renders points as perfectly sharp; light from a single point forms a tiny disc on the sensor called the circle of confusion (CoC). A DOF calculation asks a practical question: how far from the focus plane can that disc grow before a viewer at normal viewing distance perceives blur? Full-frame sensors typically use a CoC near 0.030 mm, while APS-C (around 0.019 mm) and Micro Four Thirds (0.015 mm) use smaller values because their sensors magnify more when producing the same print size. This is why the format selector changes every number in the tool.
Why aperture and distance dominate DOF. Doubling the f-number, from f/2.8 to f/5.6, roughly doubles depth of field at constant framing, because a smaller aperture accepts a narrower cone of light rays. Subject distance works the opposite way and more dramatically: DOF shrinks as you move closer. The same 50mm at f/2.8 might span meters of sharpness at 10 m but only centimeters at 0.5 m — one reason macro photographers rely on focus stacking.
The focal length myth. The old rule "longer lenses have less DOF" conflates two different effects. DOF on the subject plane is governed mainly by magnification: keep the same framing — the subject fills the frame identically — and a 200mm and a 50mm at equal aperture deliver nearly the same DOF on the subject. What changes is the background: a longer lens sees a narrower, more compressed slice of a more distant backdrop, so background blur spreads wider in the frame. Perspective comes from where you stand; DOF comes from aperture, distance, and format.
Hyperfocal distance for maximum landscape sharpness. Focus your lens at the hyperfocal distance and depth of field stretches from half that distance all the way to infinity. A 24mm lens on full frame at f/8 has a hyperfocal distance near 2.7 m: focus there and roughly 1.4 m to the horizon is acceptably sharp. Focusing on infinity instead wastes the near half of the sharp zone; focusing too close softens the horizon.
Sensor format effects. Because crop-sensor cameras use smaller CoC values, the identical lens, aperture, and distance yield less DOF on APS-C and Micro Four Thirds — roughly in proportion to the crop factor. Matching a full-frame look on APS-C calls for about one stop narrower aperture at the same framing.
Practical Use Cases
Portraits at f/1.8
Shoot an 85mm on full frame with your subject 3 m away at f/1.8, and the calculator shows a sharp zone of just a few centimeters — enough to isolate the eyes, but risky if the subject leans forward. Checking the near limit tells you exactly how much movement you can tolerate, and comparing f/2.8 shows how much safety margin you gain with minimal loss of background blur.
Landscapes at the hyperfocal point
For a 16mm or 24mm lens at f/8, the calculator's hyperfocal value tells you exactly where to focus so the foreground wildflowers and the distant ridge are sharp at once. Instead of relying on printed DOF scales — long gone from modern lenses — you set the focus distance precisely and confirm the near limit covers your closest foreground element.
Product shots needing front-to-back focus
A shoe photographed from a 45-degree angle must be sharp from toe to heel. Enter your focal length, f/11, and the camera distance to check whether the far limit clears the back of the product; if it does not, stop down further or plan a focus stack. The calculator turns trial and error into a simple checklist.
Video focus pulling plans
A 1st AC marking a follow focus knows that DOF collapses as an actor walks toward the lens. Run the subject distance at each blocking mark — 1 m, 1.5 m, 2 m — and note how the sharp zone shrinks at the near marks. Those numbers become the pull marks that keep faces sharp through the entire move.
Best Practices
- Stop down moderately rather than extremely. Most lenses are sharpest between f/5.6 and f/11; beyond that, diffraction quietly eats the sharpness you gained from added DOF.
- Focus a third into the scene for landscapes. Without a hyperfocal value handy, focusing roughly one-third of the way into the frame is a workable fallback — but use the calculator when the shot counts.
- Check DOF before the shoot, not after. Run your typical setups at home so shoot days are about composition and light, not math.
- Remember crop factor. An APS-C camera needs about one stop narrower aperture than full frame for the same DOF at the same framing.
- Trust limits, not vibes. Backgrounds often look acceptably sharp on a 3-inch LCD yet fall apart in a large print; the near/far limits are objective.
- Combine with exposure planning. A narrower aperture for more DOF demands more light or higher ISO — balance depth of field with shutter speed and sensitivity before you commit.
Ready to see the numbers for your own gear? Open the free Depth of Field Calculator, enter your usual lens, aperture, and distance, and write the hyperfocal value for your favorite landscape setup on a piece of tape stuck to your lens barrel. It takes two minutes and will quietly improve every shot you take.
Related Tools You Might Like:
- Exposure Triangle Calculator — balance aperture, shutter speed, and ISO when your DOF choice changes the exposure.
- Camera Tester — check your camera's sensor and settings performance before an important shoot.
- Passport Photo Maker — produce compliant ID photos where consistent framing and sharpness matter.
Happy shooting!
Frequently Asked Questions
Q: What is depth of field in photography? A: Depth of field is the zone in front of and behind your focus point where subjects appear acceptably sharp. It depends on aperture, subject distance, focal length, and sensor format, and the Depth of Field Calculator computes it for any combination of those inputs.
Q: What is hyperfocal distance and when should I use it? A: The hyperfocal distance is the focus distance that maximizes depth of field: focused there, everything from half that distance to infinity is acceptably sharp. Landscape photographers use it constantly so both foreground detail and a distant horizon stay sharp at moderate apertures like f/8.
Q: Does a crop sensor give more or less depth of field? A: At the same focal length, aperture, and distance, a crop sensor such as APS-C or Micro Four Thirds gives slightly less depth of field than full frame, because it uses a smaller circle of confusion. In practice, matching a full-frame look on APS-C means stopping down about one extra stop.
Q: Is the Depth of Field Calculator free and private? A: Yes. The tool runs entirely in your browser as client-side math — no account, no uploads, and your inputs never leave your device. You can use it as many times as you like.