Exposure Triangle Calculator: Master Aperture, Shutter Speed, and ISO Without Guessing
Use the Exposure Triangle Calculator to balance aperture, shutter speed, and ISO with exposure value math, an equivalent-exposure table, and a live brightness preview.
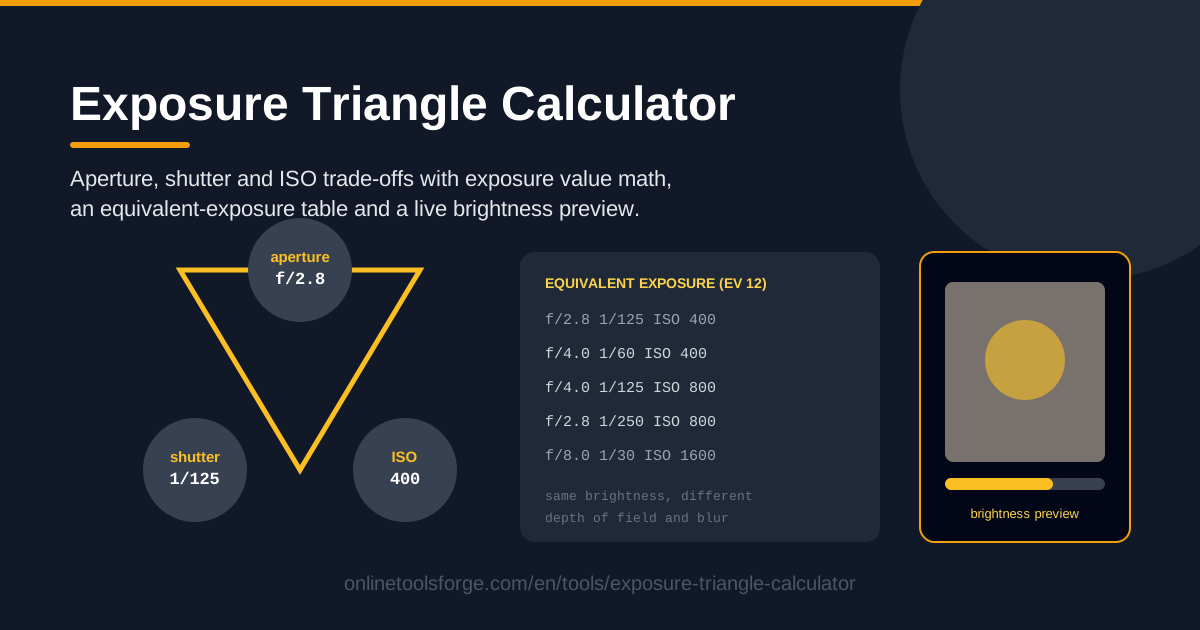
Table of Contents
Every photograph balances three camera settings: aperture, shutter speed, and ISO. Photographers call this the exposure triangle, and mastering it separates confident manual shooters from people who let the camera decide everything. The catch is that the math is awkward in your head, especially in dim light.
The Exposure Triangle Calculator takes that burden off your shoulders. Adjust the three corners and the tool computes the exposure value for you, while an equivalent-exposure table lists alternate combos with the same brightness. A live canvas preview shows what your frame will look like, and everything runs client-side in your browser.
This guide walks through the calculator step by step, explains what each corner controls beyond brightness, and applies it to real shots from sports to dim interiors.
Why Use Exposure Triangle Calculator?
- See trade-offs instead of memorizing tables. Move one setting and watch how far the others must shift to keep exposure consistent — faster intuition than any cheat sheet.
- Let the exposure value math happen for you. Aperture, shutter, and ISO combine through logarithmic stops; the calculator does the arithmetic so you can focus on the creative call.
- Compare equivalent exposures side by side. The table lists alternate f-number, shutter, and ISO combos with identical brightness; pick the one whose side effects you want.
- Preview brightness before you shoot. The live canvas preview reacts as you adjust, showing how over- or underexposed a combination is.
- Practice anywhere, risk-free. Try settings you would never risk on a paid shoot, from f/1.4 at 1/8000s to multi-second exposures, no camera required.
- Runs purely client-side. No account, no upload, no waiting — every calculation happens in your browser, even on a slow connection.
Key Features
| Feature | What it does |
|---|---|
| Independent aperture, shutter, and ISO controls | Adjust any corner of the triangle and see the other two respond |
| Exposure value math | Turns your three settings into a single EV figure that keeps brightness consistent |
| Equivalent-exposure table | Lists alternate aperture, shutter, and ISO combinations with identical brightness |
| Live brightness preview | Renders the resulting frame on canvas to judge exposure at a glance |
| Client-side operation | All calculations and rendering happen in your browser, with no server round trips |
Two details worth knowing:
- The preview is a teaching aid, not a photo simulator: it reflects brightness for balance checks, while real depth of field and noise depend on your lens and sensor.
- Unless you deliberately shift overall brightness, every change keeps the exposure value stable — like priority modes on a camera.
How to Use Exposure Triangle Calculator
- Set a baseline exposure. Start from something sensible such as f/5.6, 1/125s, ISO 400, and watch the preview until the frame balances.
- Change one corner. Decide which side effect matters — wider aperture, faster shutter, or lower ISO — and move only that setting.
- Read the equivalent-exposure table. The tool lists combinations that restore the same brightness; every row answers "what else could I dial in?"
- Check the live preview. Confirm the frame still looks right as you test rows; canvas brightness should stay steady when exposures are equivalent.
- Pick the combo that fits the shot. Choose the row whose side effects match your goal — creamy bokeh, frozen motion, or clean files — and note the settings for your camera.
Three Controls, One Brightness
Aperture, shutter speed, and ISO all control how much light the sensor records, but each has a second job. Aperture sets depth of field: f/1.8 blurs backgrounds, f/11 keeps landscapes sharp front to back. Shutter speed shapes motion: fast speeds freeze a sprinter, slow ones turn a waterfall into silk. ISO controls amplification: low values keep files clean, high values invite noise.
Stops make the system predictable: one stop doubles or halves the light. f/2.8 to f/4 is a stop darker, 1/125s to 1/60s a stop brighter, ISO 400 to 800 a stop brighter. Every corner moves in doublings, so trade-offs stay simple: give up a stop here, take one back there.
The calculator keeps the exposure value constant as you explore: widen the aperture a stop, and it shows shutter and ISO pairs that give that stop back. From a baseline of f/2.8, 1/125s, ISO 400, equivalent exposures include:
- f/4, 1/60s, ISO 400 — same brightness, more depth of field, slower shutter
- f/5.6, 1/30s, ISO 400 — two stops deeper, approaching tripod territory
- f/2.8, 1/500s, ISO 1600 — motion frozen, at the cost of noise
- f/8, 1/15s, ISO 400 — sharp across the frame, but the camera must stay still
This is where auto modes lose: auto optimizes brightness alone, with no opinion about the side effect you want. It will raise ISO into noise, drag the shutter below your handheld limit, or stop down until diffraction softens detail. Knowing the triangle lets you force the decision the camera cannot guess: this frame needs 1/1000s, and the rest follows.
Practical Use Cases
Freezing Sports Action vs Panning Motion Blur
A striker volleying a ball needs around 1/1000s. Set shutter first, then let the calculator show that f/2.8 at ISO 3200 holds that speed on an overcast day — or that a little ISO 6400 noise beats a blurred keeper. For panning cyclists, flip the logic: 1/30s with a wide aperture, and the table shows how far ISO must fall to avoid blowing out.
Blurry-Background Portraits
For creamy bokeh, open up to f/1.8 or f/2 and let the tool rebalance the other corners. The table shows whether you can keep ISO 100 for the cleanest files by slowing to 1/100s, or need ISO 200 to stay at a safe handheld 1/200s.
Low-Light Interiors Without Flash
Dim museums and restaurants are where the triangle earns its keep. Start at your widest aperture, hold the shutter just above your handheld limit (say 1/60s), and let ISO absorb the rest — the preview confirms the result before you raise the camera.
Teaching Manual Mode
Instructors can project the calculator in class; self-learners can keep it on a phone during practice. Change one variable, predict what must change elsewhere, then verify against the table and canvas preview — a full feedback loop without wasting a frame.
Best Practices
- Treat ISO as the last resort. Exhaust aperture and shutter first; every ISO doubling costs image quality you cannot win back.
- Respect handheld shutter limits. Aim for roughly 1/focal length or faster — about 1/60s on a 50mm lens; slower, brace yourself or find support.
- Preview depth of field separately. The brightness preview shows exposure balance, not bokeh; pair it with a depth of field calculator to plan sharpness.
- Bracket important shots. The table rows you rejected are exactly the one-stop brackets worth shooting in camera.
- Anchor on one corner per scene. Decide whether motion, isolation, or cleanliness matters most, lock that corner, and let the tool solve the other two.
- Re-check when light changes. Equivalent exposure assumes constant light; when clouds roll in, recompute rather than reuse old numbers.
Ready to stop guessing? Open the Exposure Triangle Calculator, set a baseline, and watch one small change ripple through aperture, shutter, and ISO — ten minutes here beats a month of cheat sheets.
Related Tools You Might Like:
- Depth of Field Calculator — plan what stays sharp at any aperture, distance, and focal length.
- Camera Tester — check your camera and its capabilities before committing to settings in the field.
- Passport Photo Maker — produce compliant ID photos once your exposure is dialed in.
Happy shooting!
Frequently Asked Questions
Q: Do I need a camera to use the Exposure Triangle Calculator? A: No. The tool runs entirely in your browser on any device, equally useful for planning a shoot or learning the concepts from scratch.
Q: How accurate is the live brightness preview? A: It reflects your settings' exposure value accurately, so relative brightness between combinations is trustworthy. Bokeh, noise, and lens character depend on your gear, so treat the preview as a balance check, not a finished photo.
Q: What is a stop, and why does the calculator use them? A: A stop is a doubling or halving of light. All three scales — aperture, shutter speed, ISO — are built from stops, which is why trading a stop between corners keeps brightness identical.